Be yourself; Everyone else is already taken.
— Oscar Wilde.
This is the first post on my new blog. I’m just getting this new blog going, so stay tuned for more. Subscribe below to get notified when I post new updates.
Art tips for maybe not so good artists
Be yourself; Everyone else is already taken.
— Oscar Wilde.
This is the first post on my new blog. I’m just getting this new blog going, so stay tuned for more. Subscribe below to get notified when I post new updates.
HI!!! And welcome back to my blog! Thank you guys so much for 30 followers, I really appreciate it!🤗❤️. And so to show my appreciation to you guys, I decided to make my own challenge, for myself, for you guys. I don’t think I’ve heard or seen anyone do this challenge before but it is… drawing from Notes (in Apple). Now if you don’t know what Notes is, it’s an app that you get when you get an Apple phone or IPad. This application has only a marker, highlighter, pencil, and eraser to work with, but on the bright side, you can change the opacity and size for each one (except the eraser). They also have a limited color palette, meaning that you can’t make your own colors, and you are not able to layer. So here it goes…
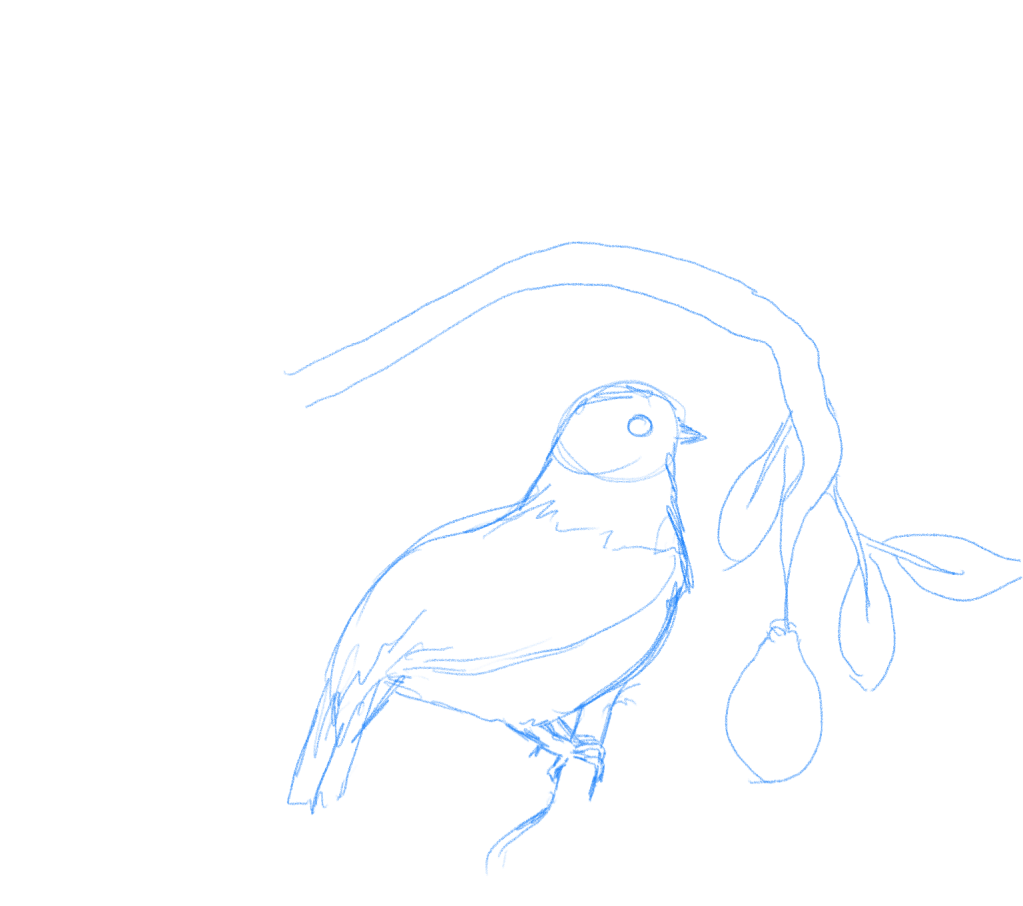
Sketching Now sketching this was complicated because I legit did not know what a partridge was until I searched it up on Pinterest for a reference photo. I ended up with the one that was a Christmas ornament to draw with, because it was easier to color. Then, I realized that I’ve also never seen a pear tree before… so I searched it up again. Now going back to the sketching, I did realize that I wasn’t able to layer and I couldn’t just erase the sketch or else the bird will look like it was an alien. So I decided to just leave the sketching and try to layer it with the marker.
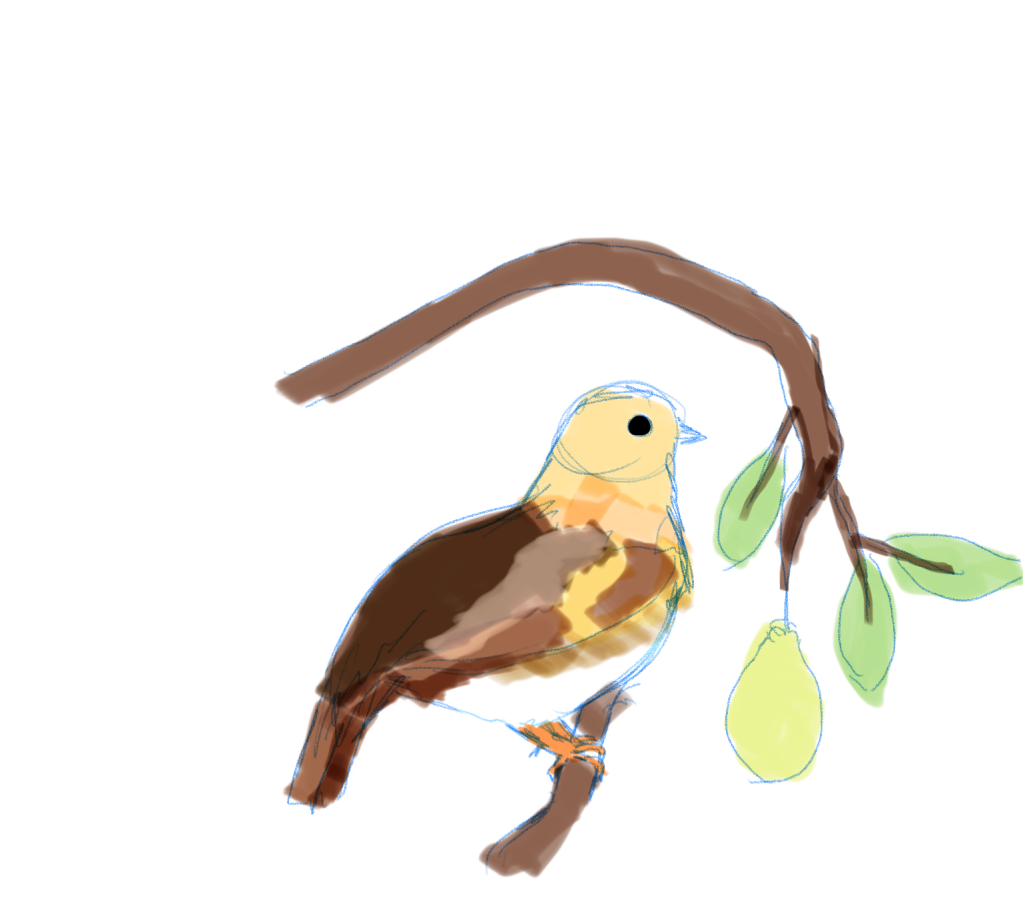
Coloring Onto the coloring stage, I selected the highlighter and set it to about 60% opacity and the medium size. Then I just colored in the bird and struggle to try to find the perfect color. But thank the white- colored highlighter because it saved my life ( I don’t know why, but it just did)!!
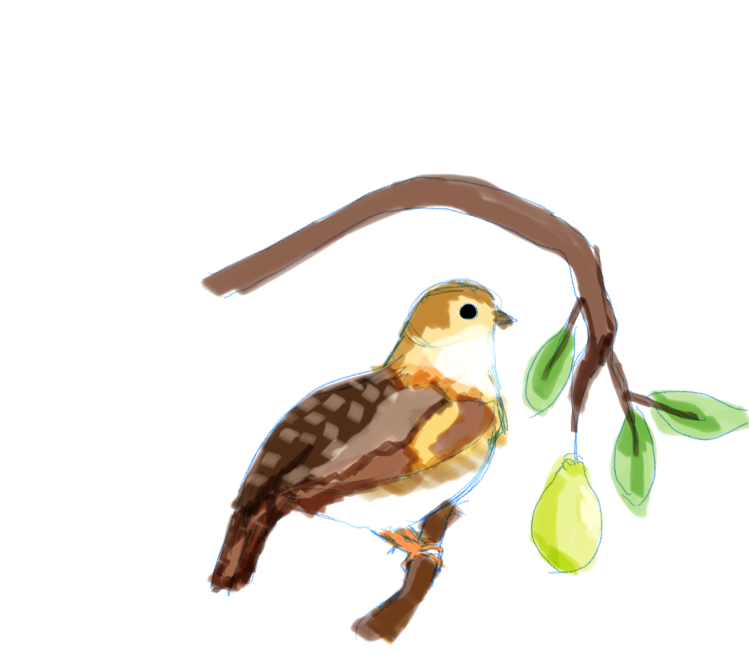
Coloring and adding in more details…
Outlining and putting highlights For outlining, I struggled a lot trying to get it perfectly outlined without the white background showing. However, I really didn’t care about that anymore because I got so frustrated, so the white parts are still going to show up. And for the dots on the feathers, I took a white marker and just drew on it. I also did this with the eyes and the streak of white on the head.
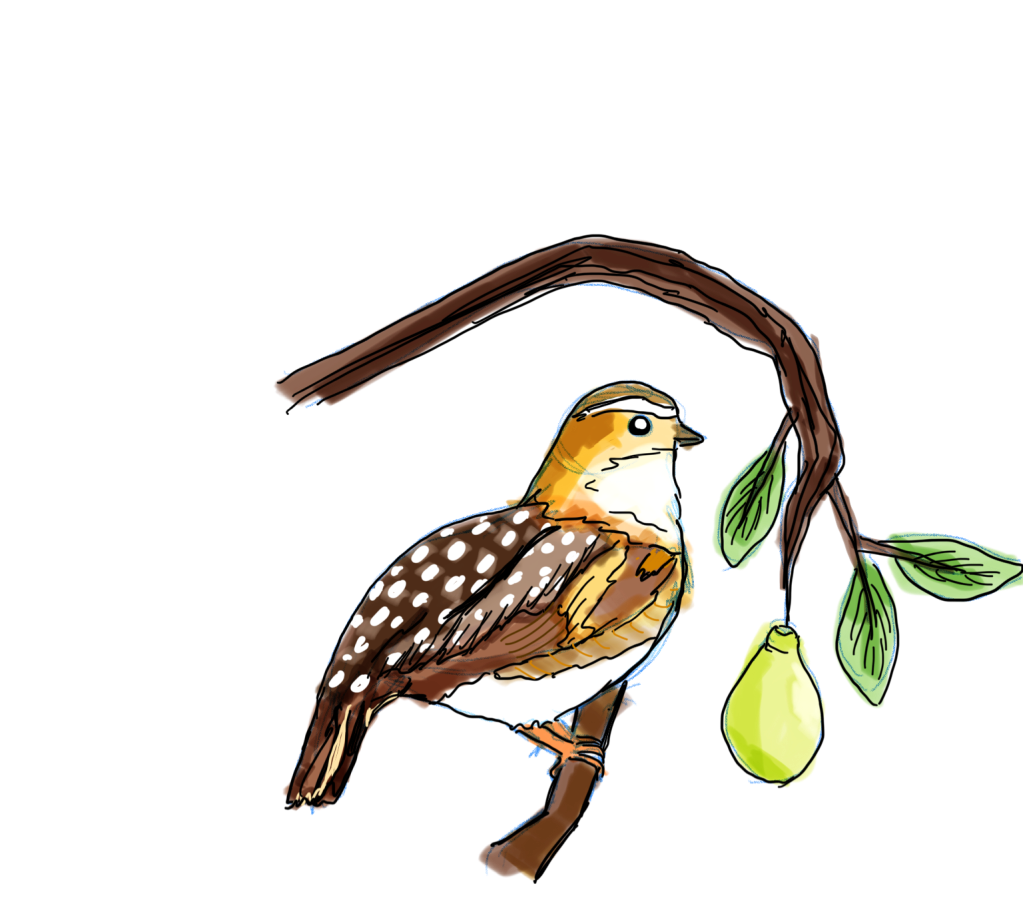
Background This stage is where I decided to put things around the bird and as usual, I put a circle. Then, I decided to put writing on it so that other people who never knew what a partridge is know what it is.

Thank you for reading my blog! I really enjoyed doing this and stay tuned for my next blog! BAIIII!!🤗🤗🤗
HIIII! And welcome back to my blog! Today I am going to be talking about some art challenges and who knows… maybe these challenges will help you motivate to do more artwork. So what is the purpose of an art challenge? The purpose of an art challenge is to help you get over your comfort zone and help you create amazing artwork that you probably didn’t even know you can achieve. An art challenge doesn’t have to come from another person; you can create your own art challenges or even through your friend’s dare, you can create awesome artworks.
Here are a list of some art challenges:
That’s all the art challenges I could think about, but feel free to suggest an art challenge in the comments section below! I hope these art challenges help motivate you to do more artwork and stay tuned for the next blog post! BAIII!!!🤗🤗🤗
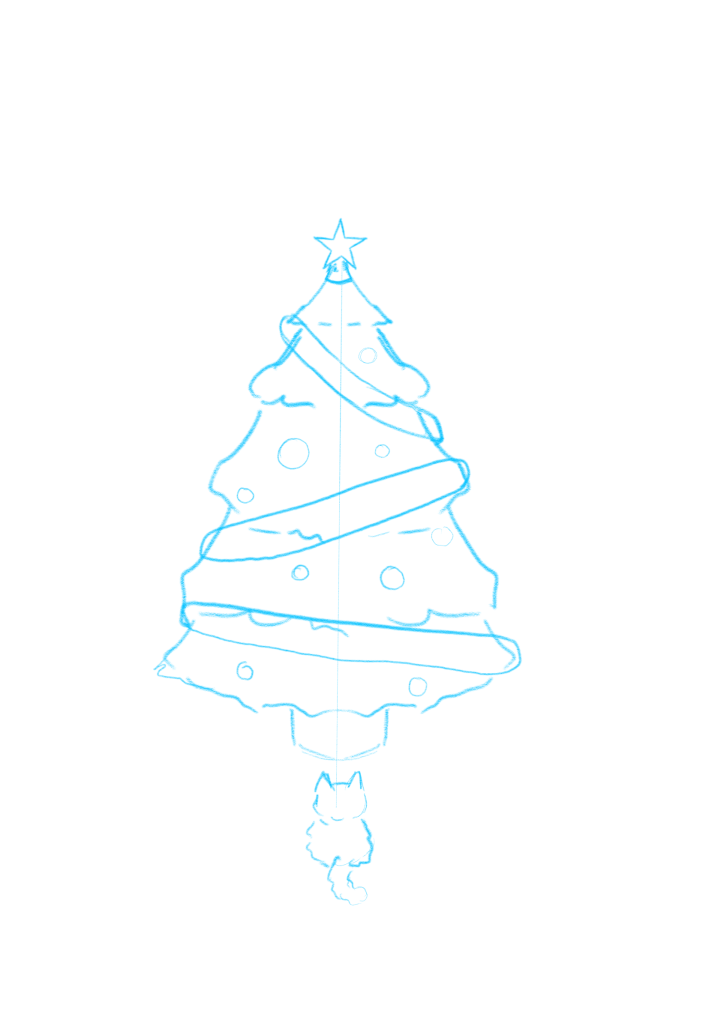
HIII and welcome back to my blog. I was recently looking at my blog posts earlier and realized that people seem to view my blogs about painting and drawing a lot. So I’d figure that I do another one and since Christmas is coming soon, I’d do one that’s Christmas themed. So I thought to myself, “ what things can you find in Christmas that is easy to draw or paint?”, and I decided on a Christmas tree. The app that I’m using is Autodesk Sketchbook and it’s free if you want to download it.
2. After that, I add a new layer and color in the tree ( only the tree) green… because this specific type of tree is green. Then, I add in a more darker green for its shadows on the same layer. For the base color, used the Paintbrush tool to color, and for the shadows, I used the Signature Ink tool. Make sure this layer is on top of the sketch layer and set the sketch layer’s opacity to about 25%, so that you can see which parts you could color.
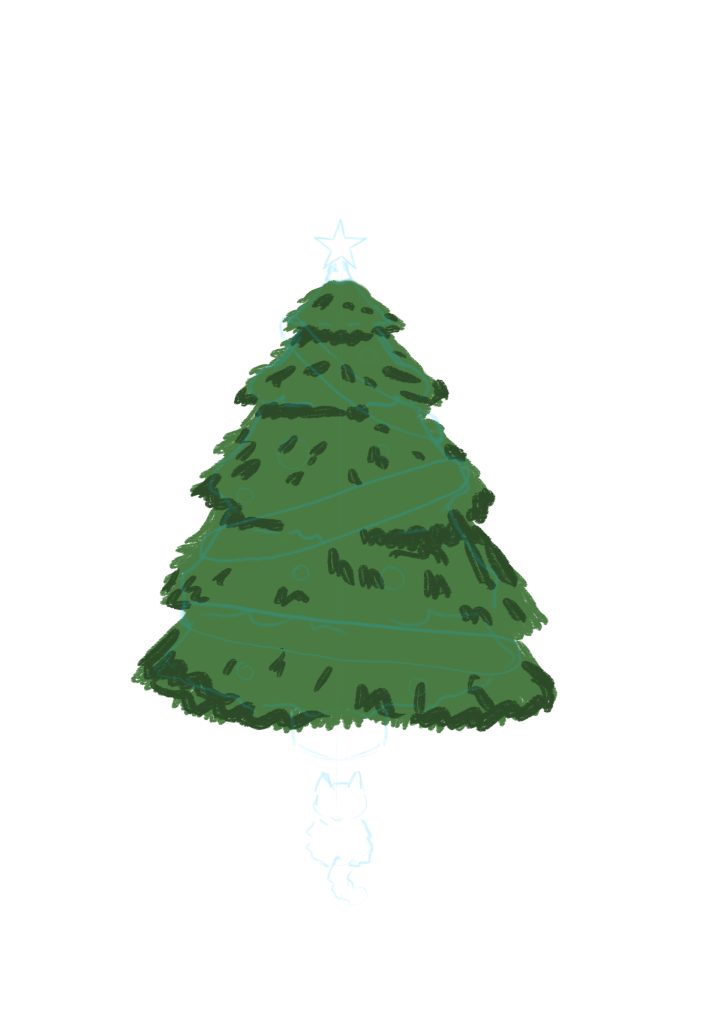
3. Once that is done, I add in some snow with the Paintbrush tool. I also add a light grey color for the shadows. This is all done in a new layer.
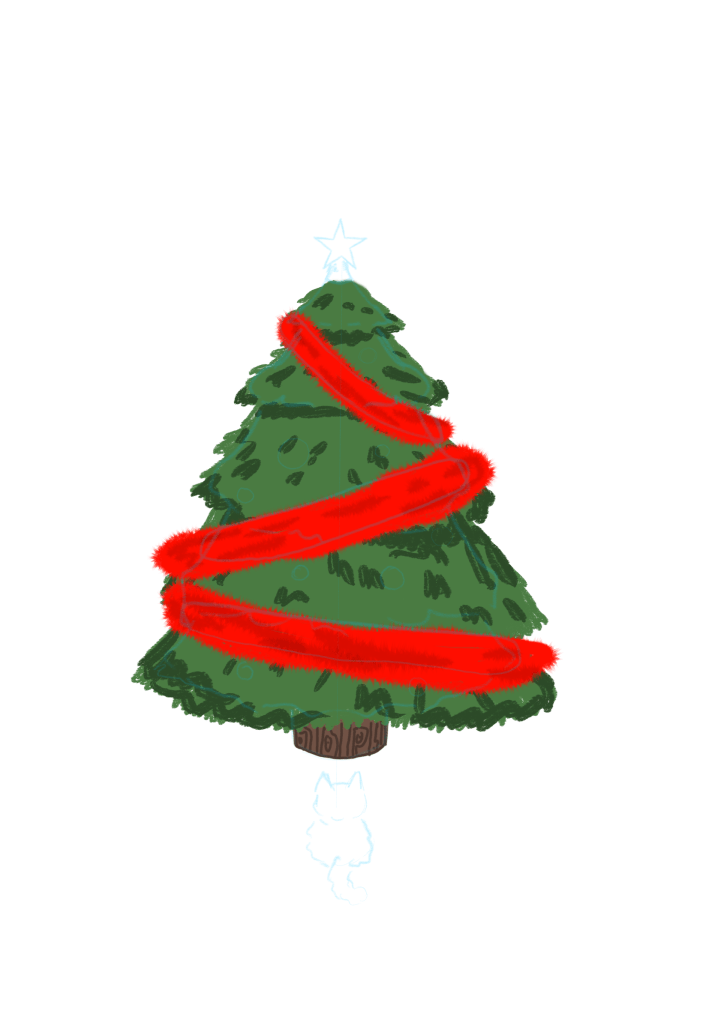
4. Then, I add a new layer; I paint in the Christmas tree streamers and paint those with the Paintbrush tool. Also add in shadows with a darker color. Then I select the Abstract 1 tool and outline the streamers with the same color. This makes the streamer look more like a streamer 😂.
5. Next, I add in another layer and the other ornaments and color them in with random colors. Since, I’m lazy, I have just put in basic colors: red, blue, green. Don’t forget to color in the star on top. Color the shadows of your ornaments a darker color and add this layer before the Christmas tree streamers layer.
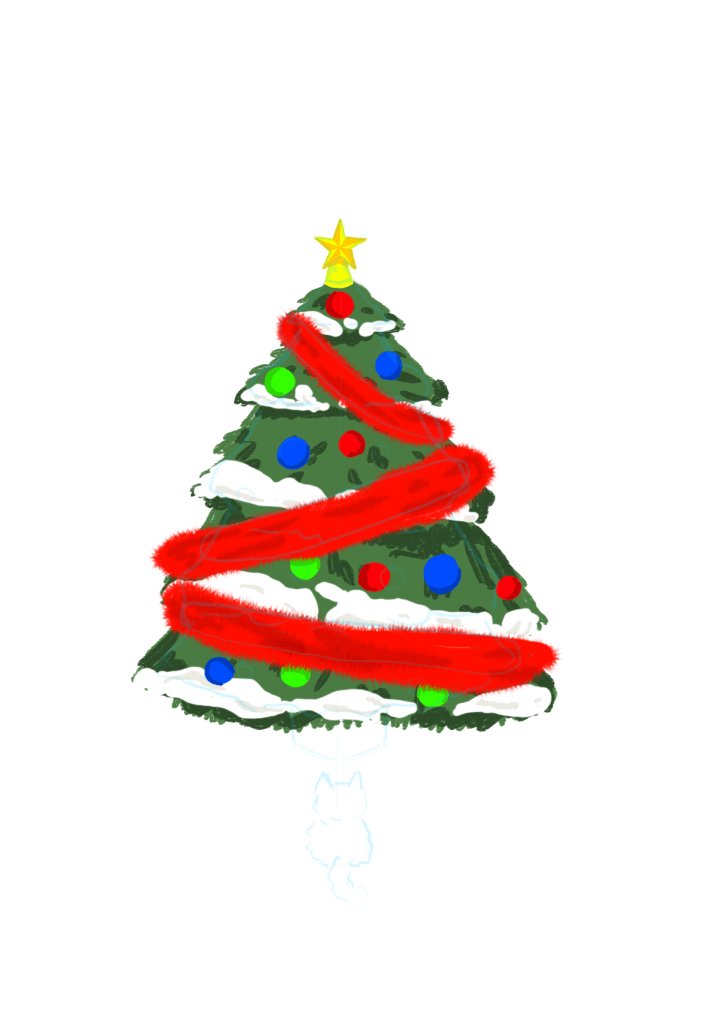
6. Again (for the 100th time) I add in a new layer and set the blending mode of your layer to Color Dodge. This allows your painting to have highlights.
7. Then, in a new layer, I outline the tree and the things on it with the Signature Ink tool with a black color. For the streamers however, I select the Abstract 1 tool and outline it using that.
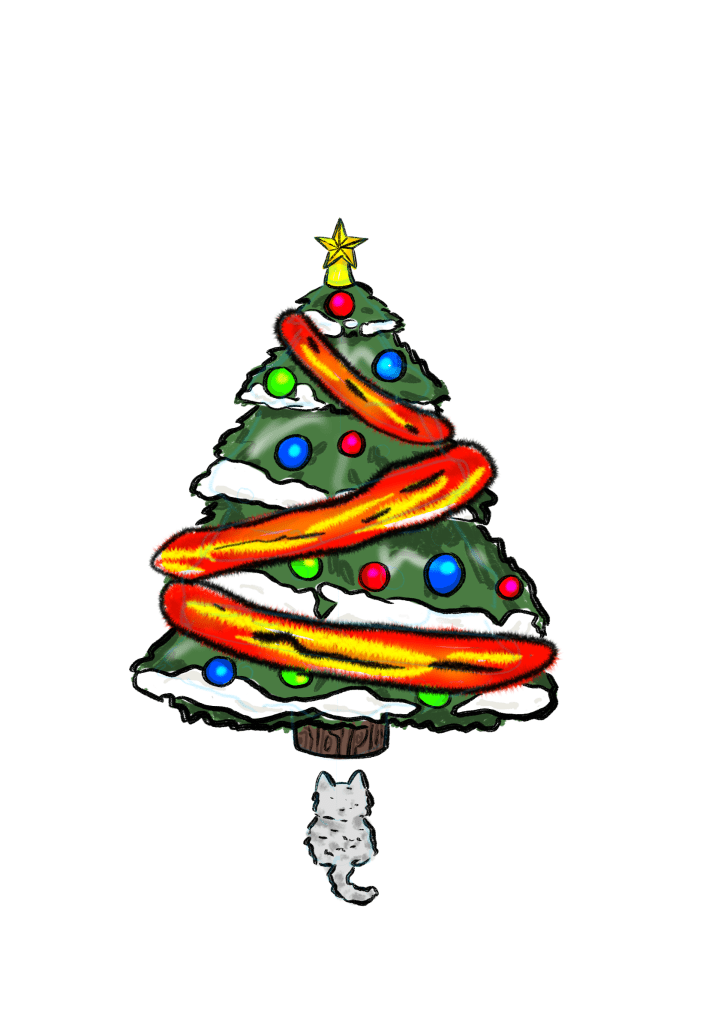
8. I almost forgot to talk about the kitty! For the kitty, I add in a light grey color and paint it with the Brush 4 tool. I also add in some darker colors for shadows and I outline it in the same layer I outlined the tree.
9. For the background,I have decided on not doing the whole thing and just sort of crop it. So, I add in a new layer below where I started painting the tree and I paint outside of the tree white with the Paintbrush tool. But before that, make sure you change the background color ( the first thing you see in the layers window). For this painting, I decided to go with a dark blue.
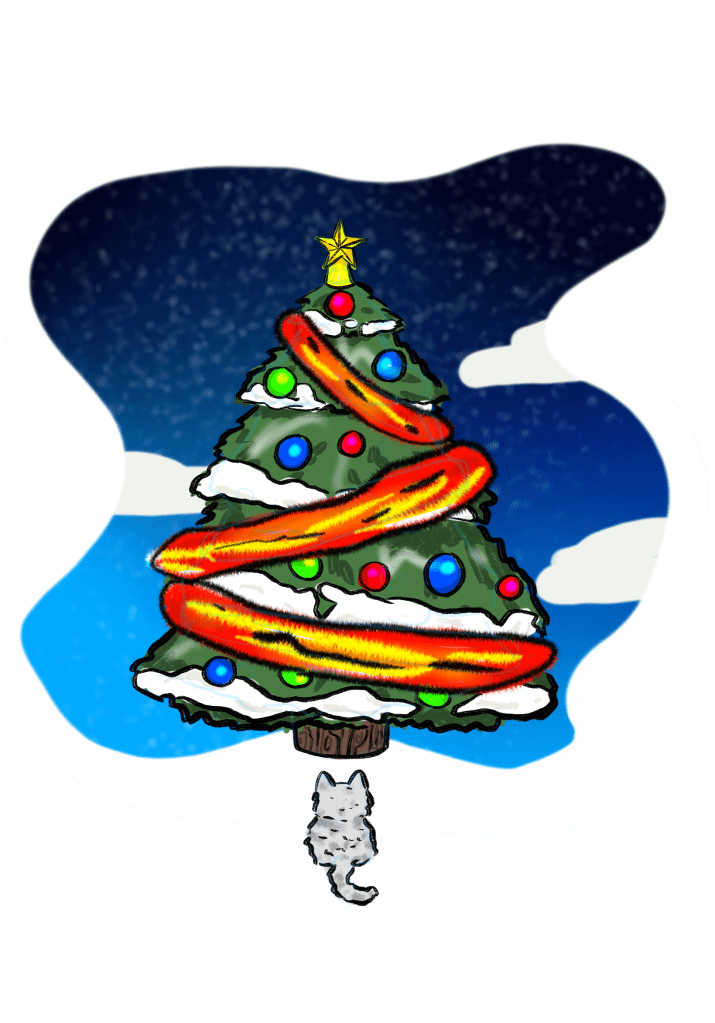
10. I color in the background a black color on the top and a light blue color on the bottom. Then, I blend it altogether. Then I add in clouds that are slightly darker than white so that it doesn’t blend in with the outer white space. For the snow, I select the Dotted 2 tool and set it to its biggest size, and I paint the background.
And we are done! Thank you so much for reading this blog and stay tuned for the next blog. BAIIII!!!!!🤗🤗🤗
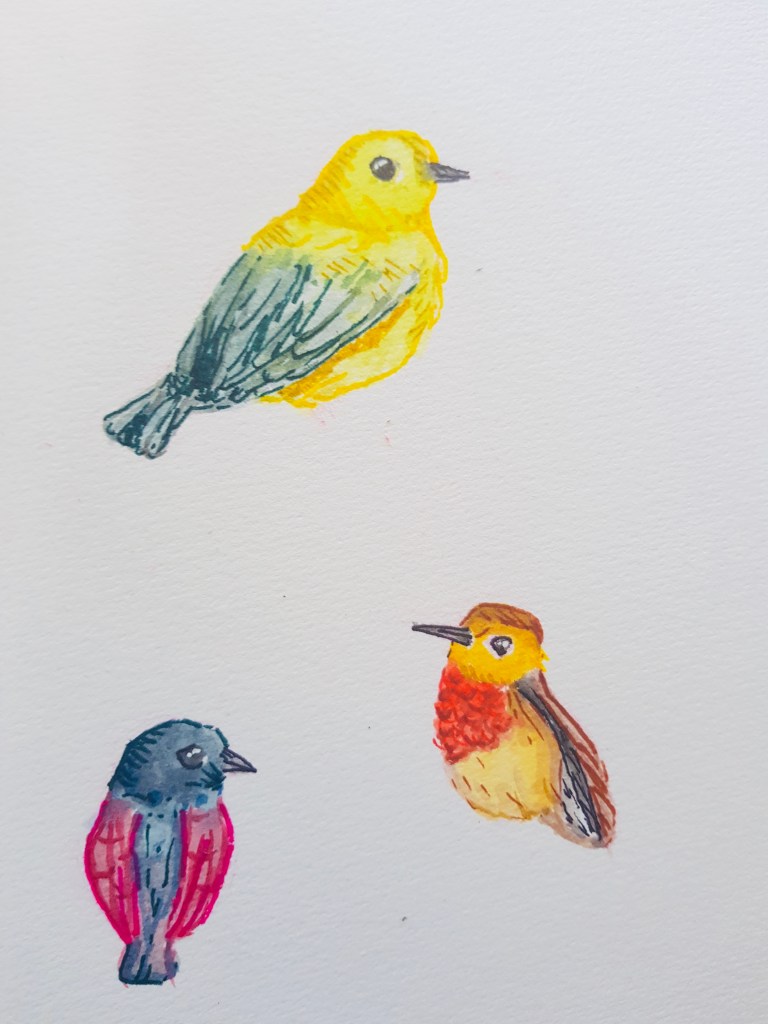
Welcome back to my blog!! Today, I will be showing you how I paint or do my art because… I’m running out of topic ideas. Usually, this type of painting is the easier ones and most of my paintings are more detailed than these ones, so they usually take a while. And I want this blog to have a simple and quick style of painting. So here it is…
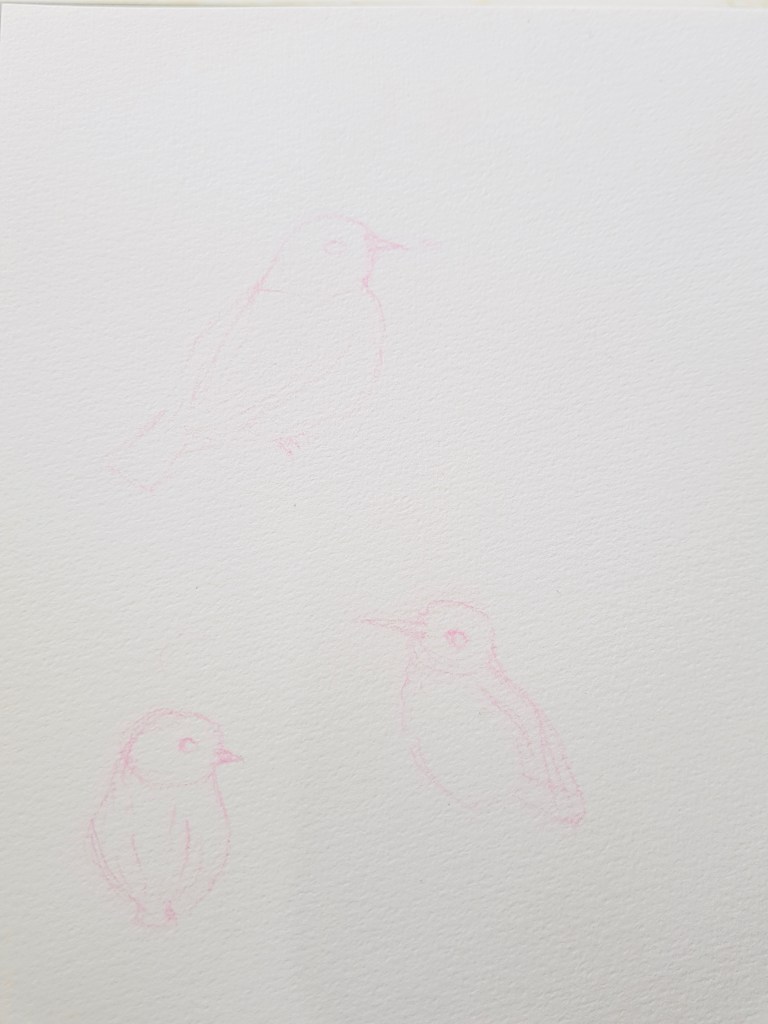
2. Before painting, I lightly erase the sketches so that it doesn’t show up in the end result. I paint the birds using my “ Sakura Koi Watercolors Pocket Field Sketch Box -12”… yes, it has a very long name. I use a reference photo for drawing them and I usually don’t match the colors that well. For me,it doesn’t have to be exactly the same… it just has to look like a bird. And so does the colors; you don’t have to match them perfectly, just paint with the colors you think is best for you’re painting.
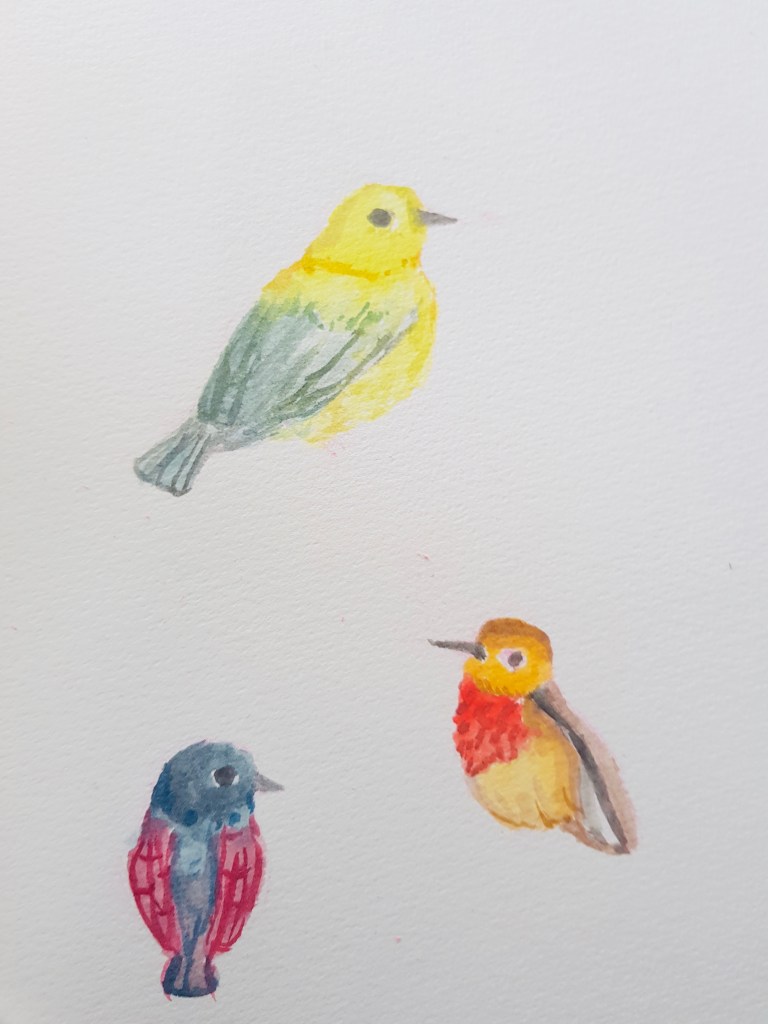
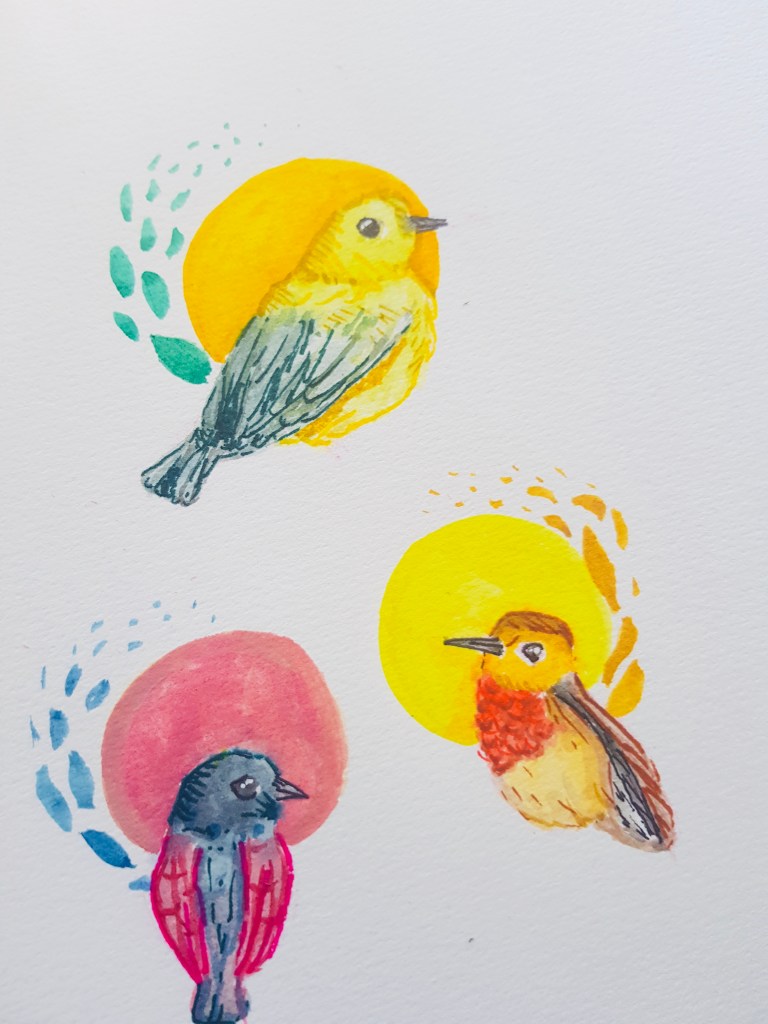
3. Now I know what you’re thinking (probably): where’s the contrast? Well… we’re still not done yet. From here, I start to use my Gelly roll white pen -0.8 that my friend got me and add highlights to the eyes. Then, I use my Snowman markers and start to color and trace some parts of the painting. The Snowman markers are nothing fancy and they’re really cheap, and colorful.
4. Now that the birds look more like birds instead of blobs of paint, I paint random circles and stuff to the background ( usually around the birds) to make the painting not so plain. You could add in anything you want onto the background.
Thank you for reading this blog and painting with me and stay tuned for the next blog. BAIIII!!!!🤗🤗🤗
As a person who likes to draw, I find it difficult to find an art style that I’m comfortable with and can work on throughout…life. But don’t worry, I already have found mines… so I’m going to share steps for finding your own art style.
If the steps above didn’t help you guys, one thing that I do is literally watching YouTube tutorial videos. But it doesn’t just end there. I would watch them and try to draw them; then, I would see the parts that I couldn’t do and the parts that I can do. The parts I can do I would keep in mind, the parts that I can’t do I would try to replace them with other of my favorite artist’s styles. So I would blend the art styles of my favorite artists and basically make them my own style.
That’s it for today’s blog!!! I hope this helps you find your art style and motivate you to keep on doing art. BAIIIII!!!!🤗🤗🤗
So recently… one of my friends said to me that my blogs were really good and that he actually reads them, which i really never expect. So here I am, actually sitting on my chair, typing on my IPad yet another blog instead of studying for my math test that is happening next week.
Now you are probably wondering how I got the idea. I know… I read all your guys’s minds 🤯🤯. Well, a while ago, on October 22, a friend told me to draw ” an octopus that is a desert”, and yes… he spelled it wrong but that is OK. And I kinda ignored the idea until I was trying to come up with another idea for another blog. So ya… I’m finally doing it.
Recently, I have just got an IPad and I decided to just draw it in the IPad. I used the app Autodesk Sketchbook and you could actually record your art process in it. Sadly, I couldn’t upload here in WordPress so here is the end result:

So basically, the head is ice cream with whipped cream on top with a cherry… on top. Then, the eyes are peppermint and the tentacles… I don’t know what they are but they are covered with chocolate.
I hoped you liked this blog and stay tuned for blogs that are coming up in the future. BAIIII !!!!!🤗🤗
When traveling, I try to pack as little art supplies as I can. The art supplies include 9 different colored watercolor pencils, a fine liner pen, a pencil, an eraser, washi tape, a watercolor brush pens, a sharpener, and tissue. If I’m traveling to a whole other country, I would cut out a piece of A5 watercolor paper and cut them into 4 pieces. The number of pieces depend on how long I will be leaving.
Colored pencils
As you read earlier I only bring 9 colored pencils which include the colors dark blue, orange, red, dark turquoise , dark green, green, purple, hot pink, and a brown. I think that as a beginner, it is best to prevent packing all the colors that you have. The reason why is because as a beginner artist, learning how to use color is very important. For example, if I would want to make a sort of shadow- ish gray, I will mix the dark blue with brown. So as you are packing for your next trip, think about your color palette. I use the steadler student grade watercolor pencils. They have been with me for about 6 years by now and they work perfectly fine. However, the lead breaks easily for some reason ( maybe because its so old). The reason I use watercolor pencils is because you have 2 different methods to choose from. You can either do regular coloring or painting. And, it is less of a mess compared to you bringing paints.
Watercolor paper
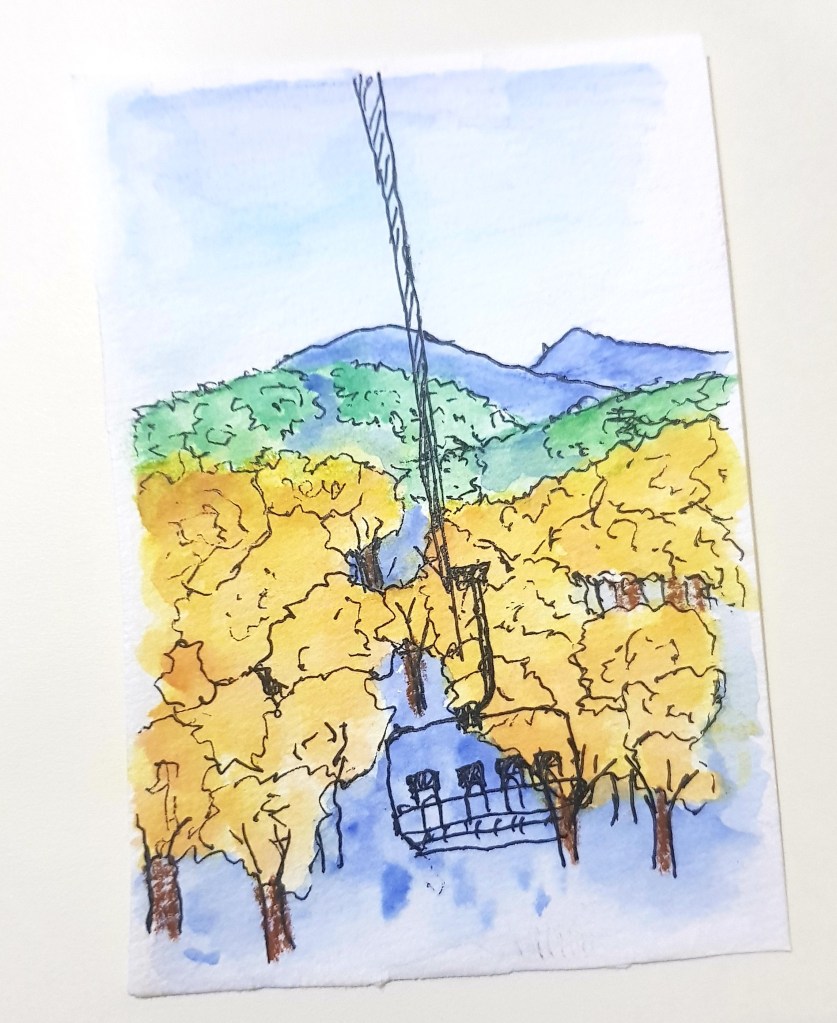
I use watercolor paper only for the sceneries, but if you have a watercolor sketchbook, i recommend bringing that with you. After I paint, I usually get a piece of tape and stick to my sketchbook.
Here are the sceneries I painted throughout my trip in Australia 🇦🇺 …

I hope this blog helped you in someway and remember… don’t pack your whole set of colored pencils!!BAIIIII!!😄😄
Whenever I travel, the most important things that I bring includes a sketchbook and a pencil case full of my art supplies. As a person who loves drawing from life, I love drawing when I’m traveling because it helps me practice my artistic skills and experiment with different sceneries and things that I can draw. However, the artworks I make while traveling don’t take hours to finish. It only takes me about 5-10 minutes to finish because you don’t want to be late for your next tour. And that, I think is the purpose of doing art when traveling. You don’t always have to make a masterpiece of some sort… it just has to be a simple sketch with maybe a little color ( if you brought some). One type of art I like to watch people see is urban sketching.
Urban sketching is sketching or painting a scenery that you are in. I mean… how can you not appreciate this:
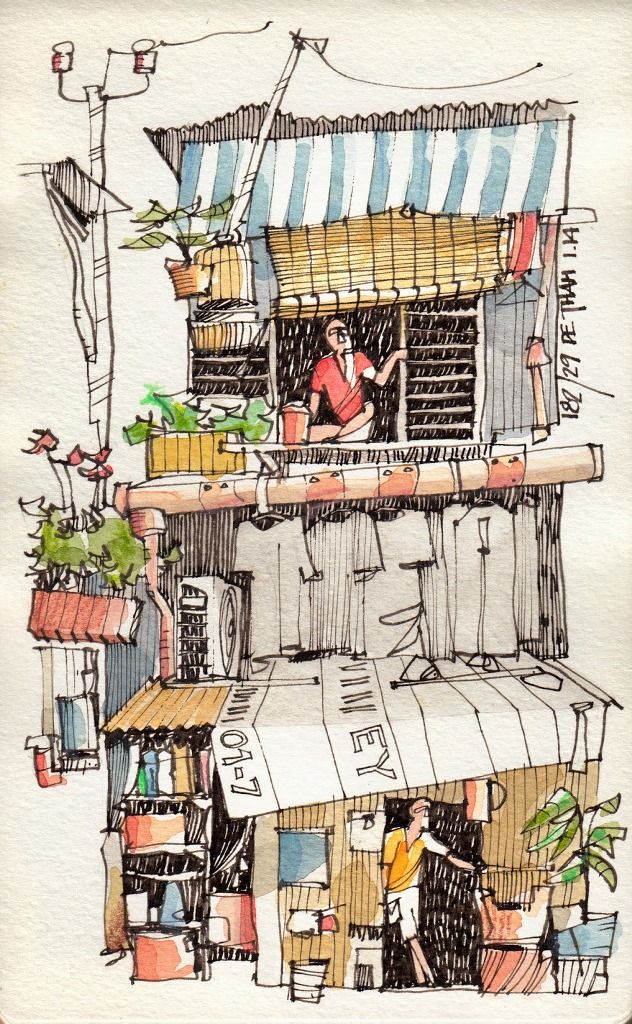
It looks quite accurate and a bit messy… but that’s the point. The artist who made this did not just stand in that location for hours, he just took the main parts of the scenery and started making his artwork (the artist is Jorge Royan by the way).
But besides urban sketching, you could draw the things that surround you like leafs, a pigeon, or the food you ate. There are much more things to draw when traveling than staying at home.
I hope this blog will make you have the urge to get out and explore the things that you haven’t drawn before and improve your artistic skills. BAIIIIII!!!!!😄😄
In my last blog, I have shown you one of my favorite art challenges which is the “draw this again” challenge. Today, I will be going deeper into this challenge.
Now, if you have a social media account, you will probably see a ton of artwork that are just so good and admirable that you sometimes, forget how they got so good. Well… here’s the thing: you have to be bad at something to be good at it. So all the posts that you see are not just talent, they are years of practice and training. That is basically the main point of this challenge. This challenge helps you see how much hard work and training artists have done over their lifetime.
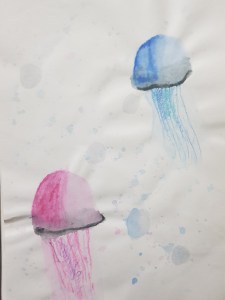
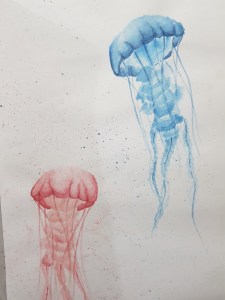
As you can see… BIG difference between the 2 paintings. It is quite embarrassing to be putting this on the internet but you can see the difference between them because I practiced and learned throughout those 2-3 years. And my 5th grade painting didn’t even look like jellyfish so…. always use a reference photo (because I did on my 7th grade painting 😅).
I hope that this blog motivates you to keep on learning and not look down on your artistic skills and… if you’d like me to repaint this comment down below!!! BAIIII😄😄
I AM BACK WITH ANOTHER BLOG!!!! And in this blog, I’m going to share you some of the things I do to fill my sketchbook. I think that most artists find it so hard to get ideas to draw. That is why I am making this blog (obviously).
Your Surroundings
I think that drawing from your surroundings is a common thing to do. However, I think that is very good practice for your skills and at the same time, you get to experience and draw different types of things. It could be a landscape or random things and objects.
5 -minute sketches
Doing 5-minute sketches is a very fast and easy way to fill up your sketchbooks. Your sketches don’t have to be perfect and it helps you learn different shapes and techniques. By doing this, you could also improve your art.
Challenges
Last month (October), there was a challenge called Inktober. Inktober is a challenge where you are given ( or you found) a list of things that you are supposed to draw for the rest of the month. This challenge helps you come over your comfort zone and draw and learn something new. There are also other challenges such as the scribble challenge, 365 days of art challenge, or the draw this again challenge. Like Inktober, by doing these challenges, you could improve your art and step out of your comfort zone. I personally love doing the draw this again challenge. This challenge requires you to draw an old drawing that you have done years or months ago. By doing this challenge, you could see how much you improved and it really motivates me to do more artwork.
Thank you for reading and if you have more ideas, feel free to comment it down below. BAAIIII😄.
Custom Art | Interior Design | Art Instructor | Logo Design
Astral Lucid Music - Philosophy On Life, The Universe And Everything...
Barcelona's Multiverse | Art | Culture | Science
My Creative Process
Heading out of Australia to escape this Aussie winter. First stop Japan, then UK/Ireland and if work doesn't call me back, onto Chicago. I will make it up as I go along
Blog writer, travel writer, journal writer, cooking, nature lover, book lover..
Only ‘The Mysterious Blogger’ on a Short Leash Knows for Sure!
